![[Updated] 2024 Approved Starlight Moment Capture Analysis](https://thmb.techidaily.com/bbe5738e0d8808e6028f714bcae487dd6fc59c5258568d2db4f80369dfe5ae67.jpg)
"[Updated] 2024 Approved Starlight Moment Capture Analysis"
Starlight Moment Capture Analysis
Vimeo Cameo Review-Video Editor & Movie Maker for iPhone

Ollie Mattison
Mar 27, 2024• Proven solutions
More and more people are using mobile technology on the go, which is why Vimeo have introduced Vimeo Cameo . It is basically an app that can be used by your iOS device to upload, as a video editor and professionally adapt with different styles and effects. Once the video is complete then you are able to upload it straight from your mobile device to the Vimeo site.
Editing features
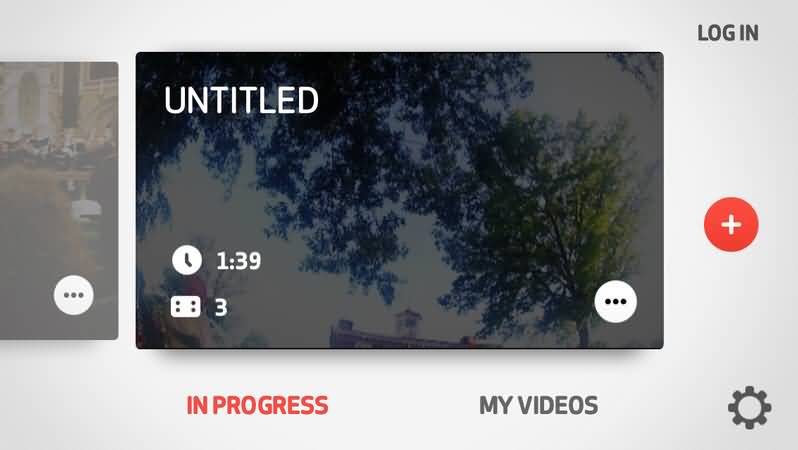
Once you have downloaded the Vimeo Cameo you just have to log in if you have an existing account or create one. Once logged in just tap to create a new video and make sure you allow the Vimeo Cameo to access the camera roll. The videos save as drafts as you go so you don’t have to worry about stopping for a while. To start a new project tap the ‘+‘ button to add any video clips from your roll. They will play automatically from the timeline once they have been uploaded.
1. Trimming clips
If you want to trim any clips you can do so by selecting the icon that looks like a pair of scissors. Just use the white dots that are located at the bottom of your screen so that you can create a different start or end point.
2. Changing clip order
If you would like your clips to be in a different order all you have to do is tap and keep your finger on the clip. Once you do this you will see the timeline pop up, which allows you to drag the clips to their new location.
3. Deleting and Replicating clips
If you want to copy or delete a clip in the video editor then just tap and hold in the same way as you did to change the order. You will then be given an option to duplicate or delete by either puling the clip up or down.
4. Add or change the theme

If you want to put in a theme then look for the three circles that overlap and select the theme button. Look through your options to change or add a theme and tap it to select it. You can change the filter intensity by using the slider. You are also able to change any text colour or font. Once you have the desired result tap the ‘theme’ button to save your changes.
5. Add, change, or remove music

To add any music to videos just use the music icon. This lets you select tracks from the library. To go through the tracks just swipe first across and up or down. You can also use the categories to make it easier to locate the music you want by genre. You can preview the songs by selecting the cover of the album and use the little play bar. By pressing the information button you are able to find out more about the song, writer, musicians etc.
Select the track once you have found it by tapping. If you decide you want to try something different or remove it altogether just return to the music menu, select the album and unselect it.
6. Changing clip audio levels
If you want to change the level of audio in a specific clip use the edit tool and find the clip you wish to adjust. Keep tapping the audio icon as this will allow you to select whether you want the audio on, off or boosted.
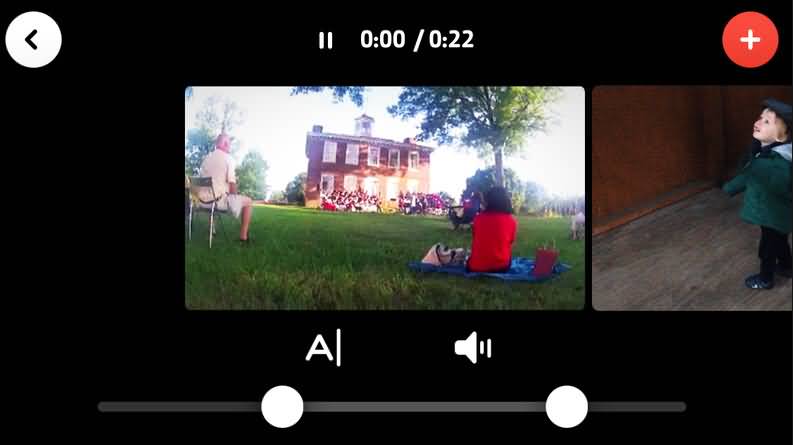
7. Adding captions

If you want to add captions to any of your clips start off by pressing the editing tool. Choose captions which is the ‘A|’ symbol. The captions are up to 40 characters but you do have the option as to where you want to put them on the screen. When you have chosen the theme earlier on the text and font will have already been determined. When you have added the captions you just have to tap the red tick to confirm you are done with the video editor.
Advanced editing
1. Add a title and thumbnail
Once you have finished with the Vimeo cameo video editor you can then select a thumbnail and title to add. Start with the upload to Vimeo part and select add a title. Choose the title you want to give to your video and you will be automatically be prompted to choose a thumbnail photograph. You can do this from a frame of your video by using the selection bar. Tap the thumbnail picture once you have found it and confirm by using the red tick.
2. Add a description
After you have decided on and saved your thumbnail in the video editor you will be taken back to the page with ‘upload to Vimeo’. Here is where you can add the description at the bottom left of the screen.
Sharing features
Once you have finished and are ready the video is uploaded automatically as private. You can specify otherwise if you are sure you have completed editing by toggling to make it public by tapping on the button in the lower right marked privacy. Select done and the video will upload automatically to your account. Use the video settings to add more privacy options by selecting settings and making adjustments in your privacy tab.
Pros and Cons
| Pros | Cons |
|---|---|
| Creates high-resolution videos | iOS only |
| Includes three different editing tools with lots of choice | —— |
Summary
Vimeo Cameo allows you to use your mobile device as a video editor by accessing the videos you already have in your camera roll. You don’t have to hook your phone up to a PC or laptop as the videos can be uploaded and edited directly from the device making it easier than ever to have more control over your videos when you are on the move.
Ollie Mattison
Ollie Mattison is a writer and a lover of all things video.
Follow @Ollie Mattison
Ollie Mattison
Mar 27, 2024• Proven solutions
More and more people are using mobile technology on the go, which is why Vimeo have introduced Vimeo Cameo . It is basically an app that can be used by your iOS device to upload, as a video editor and professionally adapt with different styles and effects. Once the video is complete then you are able to upload it straight from your mobile device to the Vimeo site.
Editing features
Once you have downloaded the Vimeo Cameo you just have to log in if you have an existing account or create one. Once logged in just tap to create a new video and make sure you allow the Vimeo Cameo to access the camera roll. The videos save as drafts as you go so you don’t have to worry about stopping for a while. To start a new project tap the ‘+‘ button to add any video clips from your roll. They will play automatically from the timeline once they have been uploaded.
1. Trimming clips
If you want to trim any clips you can do so by selecting the icon that looks like a pair of scissors. Just use the white dots that are located at the bottom of your screen so that you can create a different start or end point.
2. Changing clip order
If you would like your clips to be in a different order all you have to do is tap and keep your finger on the clip. Once you do this you will see the timeline pop up, which allows you to drag the clips to their new location.
3. Deleting and Replicating clips
If you want to copy or delete a clip in the video editor then just tap and hold in the same way as you did to change the order. You will then be given an option to duplicate or delete by either puling the clip up or down.
4. Add or change the theme
If you want to put in a theme then look for the three circles that overlap and select the theme button. Look through your options to change or add a theme and tap it to select it. You can change the filter intensity by using the slider. You are also able to change any text colour or font. Once you have the desired result tap the ‘theme’ button to save your changes.
5. Add, change, or remove music
To add any music to videos just use the music icon. This lets you select tracks from the library. To go through the tracks just swipe first across and up or down. You can also use the categories to make it easier to locate the music you want by genre. You can preview the songs by selecting the cover of the album and use the little play bar. By pressing the information button you are able to find out more about the song, writer, musicians etc.
Select the track once you have found it by tapping. If you decide you want to try something different or remove it altogether just return to the music menu, select the album and unselect it.
6. Changing clip audio levels
If you want to change the level of audio in a specific clip use the edit tool and find the clip you wish to adjust. Keep tapping the audio icon as this will allow you to select whether you want the audio on, off or boosted.
7. Adding captions
If you want to add captions to any of your clips start off by pressing the editing tool. Choose captions which is the ‘A|’ symbol. The captions are up to 40 characters but you do have the option as to where you want to put them on the screen. When you have chosen the theme earlier on the text and font will have already been determined. When you have added the captions you just have to tap the red tick to confirm you are done with the video editor.
Advanced editing
1. Add a title and thumbnail
Once you have finished with the Vimeo cameo video editor you can then select a thumbnail and title to add. Start with the upload to Vimeo part and select add a title. Choose the title you want to give to your video and you will be automatically be prompted to choose a thumbnail photograph. You can do this from a frame of your video by using the selection bar. Tap the thumbnail picture once you have found it and confirm by using the red tick.
2. Add a description
After you have decided on and saved your thumbnail in the video editor you will be taken back to the page with ‘upload to Vimeo’. Here is where you can add the description at the bottom left of the screen.
Sharing features
Once you have finished and are ready the video is uploaded automatically as private. You can specify otherwise if you are sure you have completed editing by toggling to make it public by tapping on the button in the lower right marked privacy. Select done and the video will upload automatically to your account. Use the video settings to add more privacy options by selecting settings and making adjustments in your privacy tab.
Pros and Cons
| Pros | Cons |
|---|---|
| Creates high-resolution videos | iOS only |
| Includes three different editing tools with lots of choice | —— |
Summary
Vimeo Cameo allows you to use your mobile device as a video editor by accessing the videos you already have in your camera roll. You don’t have to hook your phone up to a PC or laptop as the videos can be uploaded and edited directly from the device making it easier than ever to have more control over your videos when you are on the move.
Ollie Mattison
Ollie Mattison is a writer and a lover of all things video.
Follow @Ollie Mattison
Also read:
- [New] 2024 Approved Visionary's Guide Top 5 Slow-Motion Tech
- [New] Free Vimeo Tutorial to Craft Engaging Videos for 2024
- [Updated] 2024 Approved The Top Tiers of Treasured Valheim Trees
- [Updated] 2024 Approved Unlocking Vimeo Content Step-by-Step Free & Licensed Tools Guide
- [Updated] Disable Snippet View in YouTube for Full Content for 2024
- [Updated] Subtle Sounds, Clear Vision Audio Cleanup Methods Reviewed
- [Updated] The Core of Vimeo Empowering Video Artists & Audiences for 2024
- 2024 Approved Leveraging Vimeo Resources Add Excellent Video Content to Your PPTs
- In 2024, Crafting Consumer Contentment Masterful Unboxing Tactics
- In 2024, Strategies to Eliminate Frames Loss in OBS Recordings
- Nvidia 3D Vision Drivers Free Download for Windows [Solved]
- Silent Snapshots Avoiding Blurry Blows
- Title: [Updated] 2024 Approved Starlight Moment Capture Analysis
- Author: Michael
- Created at : 2024-12-29 19:11:39
- Updated at : 2025-01-06 04:00:17
- Link: https://vimeo-videos.techidaily.com/updated-2024-approved-starlight-moment-capture-analysis/
- License: This work is licensed under CC BY-NC-SA 4.0.