
"2024 Approved Navigating Video Sharing From iMovie to the Vimeo Network"
Navigating Video Sharing: From iMovie to the Vimeo Network
How to Upload iMovie Video to Vimeo

Ollie Mattison
Mar 27, 2024• Proven solutions
Many users would like to share their videos from iMovie to their social networks, such as YouTube, Facebook, and Vimeo. iMovie’s “Share” option makes it easy to upload your new video straight to your social networks account from iMovie. In this article, we’ll teach you how to upload iMovie videos to Vimeo easily and smoothly.
Part 1: How to Upload iMovie Videos to Vimeo
In order to upload iMovie videos to Vimeo, you have to set up an account with Vimeo before uploading videos. Watch the video below to upload iMovie video to Vimeo.
Here’re the detailed steps:
Step 1: Click the Share button which can be located at the top of your screen.

Step 2: Select Vimeo.
Then all you need to do is to enter the email address you used to log into Vimeo, your password as well as a title, description, and tags for the video. You can also select which size you’d like your video to be. Then read the Vimeo terms of service and click Publish.
Step 3: Wait for the pop-up message to appear indicating your upload is complete.
Part 2: How to Compress the Video
When trying to upload iMovie videos to Vimeo, many people may get a pop up telling them the file is too big. Don’t dismay as compressing the video will allow you to upload without additional problems.
Step 1: Find the export settings in your program, generally under “File – Export”, “File – Share”, or “Save As”.
Step 2: Select “File” and save the video to Mac.
Step 3: Compress the video.
An alternative to the aforementioned compression method is to use Compressor. Before you can do anything, you need to set up an account first or use an existing Facebook or Google account to do so.
One of the most popular tools that can significantly shrink the file size without losing quality is ClipChamp .
Follow this instruction to compress your videos without sacrificing the quality.
Step 1: Upload your video and set it to compress.
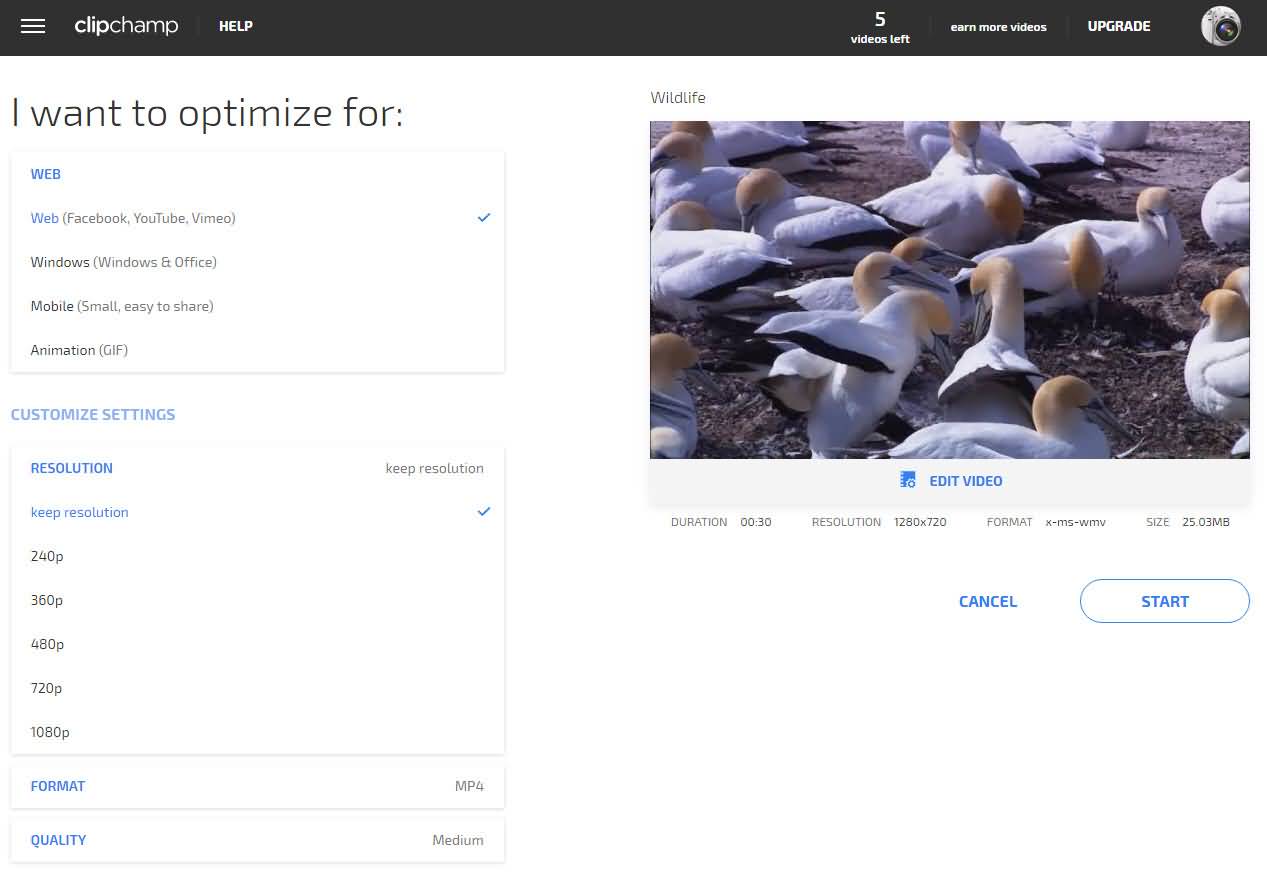
Step 2: Press Start to begin compressing.
Step 3: Then share the video directly to Vimeo.

As you can see, using the Clipchamp compressor to compress before you upload iMovie videos to Vimeo is a simpler, faster way to do. It’s great for people who are new to video making, editing, and uploading. For those with more skill, reducing the steps is an excellent way to save time and get videos up faster.
Ollie Mattison
Ollie Mattison is a writer and a lover of all things video.
Follow @Ollie Mattison
Ollie Mattison
Mar 27, 2024• Proven solutions
Many users would like to share their videos from iMovie to their social networks, such as YouTube, Facebook, and Vimeo. iMovie’s “Share” option makes it easy to upload your new video straight to your social networks account from iMovie. In this article, we’ll teach you how to upload iMovie videos to Vimeo easily and smoothly.
Part 1: How to Upload iMovie Videos to Vimeo
In order to upload iMovie videos to Vimeo, you have to set up an account with Vimeo before uploading videos. Watch the video below to upload iMovie video to Vimeo.
Here’re the detailed steps:
Step 1: Click the Share button which can be located at the top of your screen.
Step 2: Select Vimeo.
Then all you need to do is to enter the email address you used to log into Vimeo, your password as well as a title, description, and tags for the video. You can also select which size you’d like your video to be. Then read the Vimeo terms of service and click Publish.
Step 3: Wait for the pop-up message to appear indicating your upload is complete.
Part 2: How to Compress the Video
When trying to upload iMovie videos to Vimeo, many people may get a pop up telling them the file is too big. Don’t dismay as compressing the video will allow you to upload without additional problems.
Step 1: Find the export settings in your program, generally under “File – Export”, “File – Share”, or “Save As”.
Step 2: Select “File” and save the video to Mac.
Step 3: Compress the video.
An alternative to the aforementioned compression method is to use Compressor. Before you can do anything, you need to set up an account first or use an existing Facebook or Google account to do so.
One of the most popular tools that can significantly shrink the file size without losing quality is ClipChamp .
Follow this instruction to compress your videos without sacrificing the quality.
Step 1: Upload your video and set it to compress.
Step 2: Press Start to begin compressing.
Step 3: Then share the video directly to Vimeo.
As you can see, using the Clipchamp compressor to compress before you upload iMovie videos to Vimeo is a simpler, faster way to do. It’s great for people who are new to video making, editing, and uploading. For those with more skill, reducing the steps is an excellent way to save time and get videos up faster.
Ollie Mattison
Ollie Mattison is a writer and a lover of all things video.
Follow @Ollie Mattison
Also read:
- [New] 2024 Approved Vimeo's No-Cost Tools Elevate Your Video Edits
- [New] Ace Video Acquisition Strategies for Savvy Software & No-Software Use for 2024
- [New] Fixing Inactive OBS Video Inputs
- [New] In 2024, Quick and Reliable Vimeo File Retrievers
- [New] Innovative Recording Screen & Camera with Vimeo Record for 2024
- [Updated] 2024 Approved Cutting Edge Alternatives to Vimeo's Video Editor
- [Updated] 2024 Approved Effortlessly Upload Your iMovie Masterpieces to Vimeo
- [Updated] AI-Infused Title Engine Your Ultimate Video Marketing Tool
- [Updated] Create Vibes with GIFs Turning Vimeo Videos Into Animated Graphics
- [Updated] Expert Advice How to Share Your iMovie Videos on Vimeo
- Enable and Watch AV1 Video Content with Ease Using Plex – Step-by-Step Tutorial
- Expert Review of the Efficient, Battery-Operated Google Wireless Nest Doorbell
- Guía Paso a Paso: Clonar Windows 11 Y Configurar Un Sistema De Inicio Desde Una Memoria USB (Tres Escenarios Ilustrados)
- How to Transfer Apps from OnePlus 11R to Another | Dr.fone
- In 2024, Climbing the Popularity Ladder with Staff-Chosen Videos at Vimeo
- In 2024, Ultimate Guide on Realme GT 5 Pro FRP Bypass
- Installing Toshiba's Bluetooth Driver: Step-by-Step Instructions & Download Links
- Mastery Guide to Flawless SRT File Construction
- Revisión De La Versión Más Reciente De ScreenRec en 2024: Lo Que Necesitas Saber Según Movavi
- Title: 2024 Approved Navigating Video Sharing From iMovie to the Vimeo Network
- Author: Michael
- Created at : 2024-12-11 18:36:34
- Updated at : 2024-12-12 18:15:57
- Link: https://vimeo-videos.techidaily.com/2024-approved-navigating-video-sharing-from-imovie-to-the-vimeo-network/
- License: This work is licensed under CC BY-NC-SA 4.0.